Using APIOps to manage API lifecycle in Azure API Management
Author:
Rakesh Lakshminarayana
Published: October 18, 2023
16 minutes to read
API Management is a multi-faceted process that involves several teams and stakeholders. The API Management process includes designing, building, publishing APIs. The process is iterative and involves continuous improvement. For instance, it may involve adding new APIs, updating existing APIs, or deprecating APIs. It is important to adopt DevOps techniques to manage the API lifecycle to ensure quality, consistency, and improved productivity.
While there are several ways of introducing DevOps practices to API Management, there is no industry standard. In this post, we will be looking into how to use APIOps toolkit in Azure API Management service.
APIOps puts the Azure APIM artifacts (api, backends, policies etc) under version control. These artifacts will be used as the source of truth for the APIM environment. The list of resources supported by APIOps toolkit can be found here.
APIOps provides a pipeline for pushing these artifacts under the source control repository to the APIM instance. We will be referring to this pipeline as Publisher pipeline.
The APIOps solution supports a scenario in which users create APIs from the Azure portal first. Another pipeline referenced as Extractor is used to generate the artifacts by scanning the existing APIM instance. By default, the Extractor pipeline creates a new pull request to the main branch with the updates. We will be discussing more about the steps to generate the artifacts in the later sections.
Note that using the Extractor pipeline is optional. Users can directly add or modify API resources from their IDE and push the changes to the remote branch if they prefer.
The next section will demonstrate how APIOps can be used to manage API lifecycle with a step-by-step tutorial.
ApiOps provides pipelines for both GitHub and Azure DevOps. We will be using Azure DevOps, and Azure Repos for version control.
Note that the pipelines should be viewed as a starting point, and can be tailored to align with your project requirements. In this tutorial, we will be using the following workflow:
- Build the API from the Azure Portal. We will be importing a sample service using Open API specification.
- Extract the API resources by scanning the APIM instance.
- Review the generated artifacts and synchronize the changes to the source code repository.
- Deploy the API resources in the source code repository to the API Management instance.
- Promote the deployment to another environment (e.g. Production). This is to demonstrate that pipeline can deploy to multiple environments with its own set of variables and configurations.

Let us start by setting up a new Azure DevOps project.
Prerequisites
The following prerequisites are required:
- Access to an Azure subscription
- Access to Azure DevOps organization
- Service connection to your Azure subscription
Create Azure DevOps Project
- Sign in to your organization.
- Select New project.
- Enter the name of the project as
APIOpsDemoand click on Create. Azure DevOps displays the project welcome page.
Create APIOps Pipelines
In this step, we will configure APIOps tools in APIOpsDemo project.
- In the Azure DevOps portal, select
APIOpsDemoproject and select Repos. - From the repo drop-down, select APIOpsDemo repository.

- Select Clone to copy the repository URL and clone the repository to your local machine.
- Navigate to the APIOps release page to download the artifacts. As of the time of writing this tutorial, the most recent version of the APIOps tool is v4.10.2. There could be breaking changes in the later versions. If you want to follow along with this tutorial, make sure to download v4.10.2 version used in the demo.
- Download the Azure_DevOps.zip file under the Assets section and extract the content into APIOpsDemo repository.
-
Commit all the files, and push the changes to the remote repository. The repository should now look as follows:
-
We will now add the pipelines in
APIOpsDemoproject. Let us start by creatingExtractorpipeline:- In the Azure DevOps portal, select
APIOpsDemoproject. - Select New Pipeline -> Azure Repos Git.
- Select the
APIOpsDemorepository and choose Existing Azure Pipelines Yaml file. Enter the path of the yaml file as/tools/pipelines/run-extractor.yaml. - Click on Continue to create the pipeline.
- Rename the pipeline as
Extractor.
- In the Azure DevOps portal, select
-
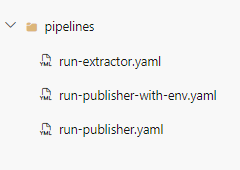
Now create the
publisherpipeline using the same steps as above. This time you will be selecting/tools/pipelines/run-publisher.yamlfile. Rename the pipeline asPublisher. You should now see both the pipelines as shown in the below image:
-
Follow the steps below to configure the variables used by the pipelines:
- In the Azure DevOps portal, select
APIOpsDemoproject. - Select Pipelines > Library > + Variable group. Enter
apim-automationas the name of the variable group. - Enter the name and value for each of the following variable to include in the group.
Variable Name Description SERVICE_CONNECTION_NAME The name of the Service connection.
You should add the service connection name used inAPIOpsDemoproject settingsapiops_release_version The release number of the APIOps toolkit. As mentioned in the previous section, we will be using v4.10.2 version in this tutorial The variable group should now look as follows:
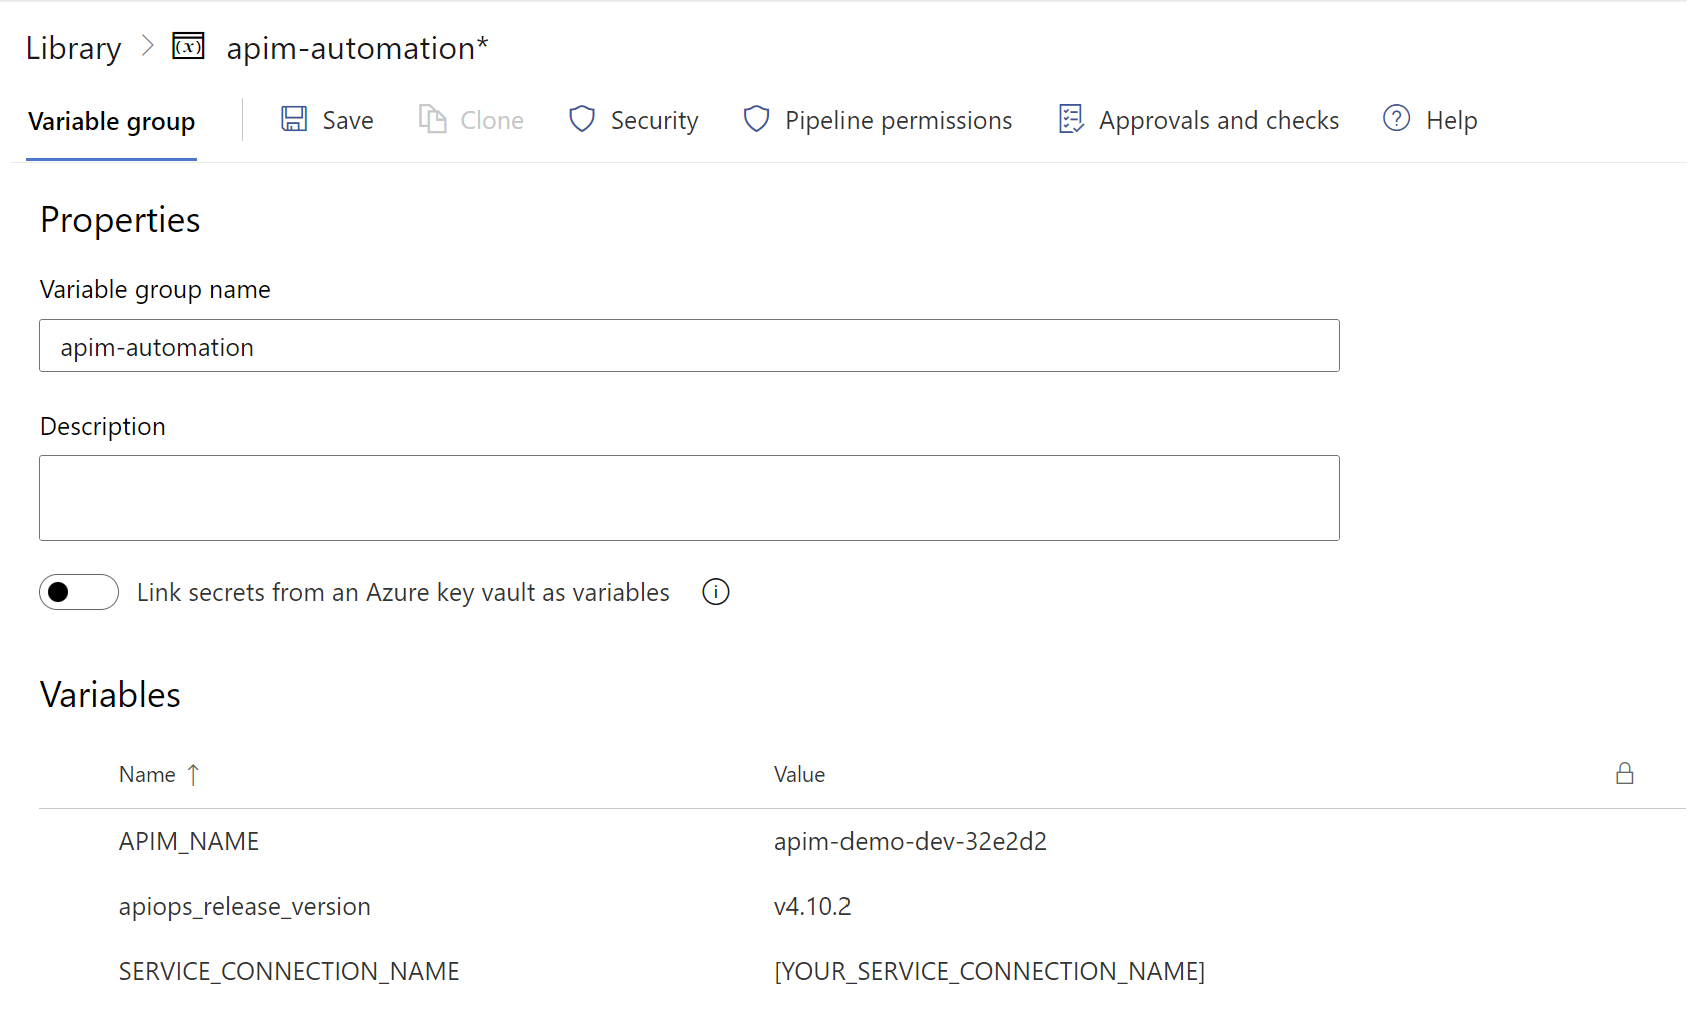
- In the Azure DevOps portal, select
Create Azure API Management service
Let us go ahead and create the API Management service required to demonstrate the APIOpsDemo pipelines. We will also be adding sample API to the APIM instance later.
- Sign in to the Azure CLI by using the
az logincommand -
Create a resource group
rg-demo-dev$resourceGroupName='rg-demo-dev' az group create --name $resourceGroupName --location australiaeast -
Create an API Management service instance in the Developer tier. In the below snippet, I am using
apim-demo-devas the name of the APIM. You should update the name to a unique value.$apimServiceName='[REPLACE-THIS]' $resourceGroupName='rg-demo-dev' az apim create --name $apimServiceName --resource-group $resourceGroupName \ --publisher-name Contoso --publisher-email admin@contoso.com \ --no-wait -
Note that it can take around 40 minutes to create and activate the API Management service. The API Management service instance is complete when the provisioningState is
Succeeded. You can check the status by running the following command:$apimServiceName='[REPLACE-THIS]' $resourceGroupName='rg-demo-dev' az apim show --name $apimServiceName --resource-group $resourceGroupName --query provisioningState
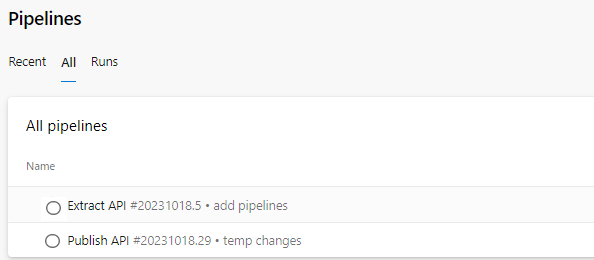
Extract API Resources from APIM
The Extractor pipeline generates APIOps artifacts from an existing APIM instance. This pipeline is useful for teams who build their APIs from the Azure portal.
-
We will first create an API in the new APIM instance by importing Open API specification. For this demo, we will use the
conferenceapibackend API provided by Microsoft and hosted on Azure.- Sign in to the Azure CLI by using the
az logincommand -
Run the following commands to import the Open API specification into the APIM instance. Replace the APIM service name before you run the commands.
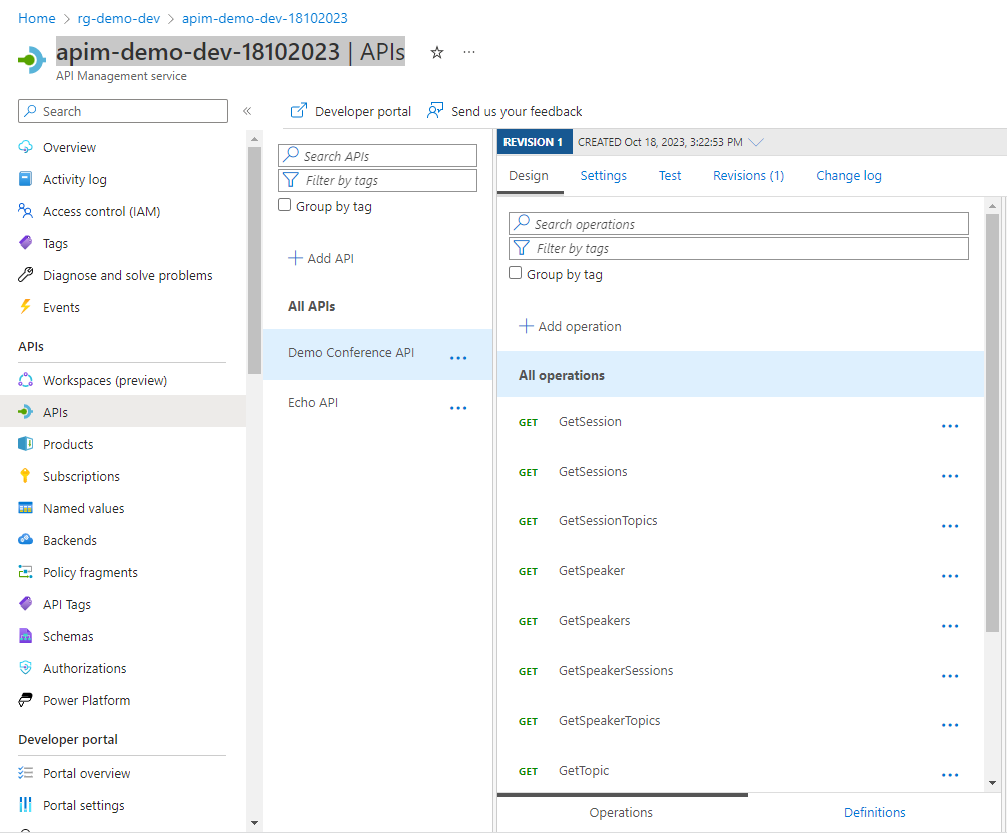
# API Management service-specific details
$apimServiceName='[REPLACE-THIS]'
$resourceGroupName='rg-demo-dev'

# API-specific details
$apiId="demo-conference-api"
$apiPath="conference"
$specificationFormat="OpenAPI"
$specificationURL="https://conferenceapi.azurewebsites.net/?format=json"

# Import API
az apim api import --path $apiPath --resource-group $resourceGroupName \
    --service-name $apimServiceName --api-id $apiId \
    --specification-format $specificationFormat --specification-url $specificationURL
You will now see Demo Conference API added in your APIM instance.
- Sign in to the Azure CLI by using the
-
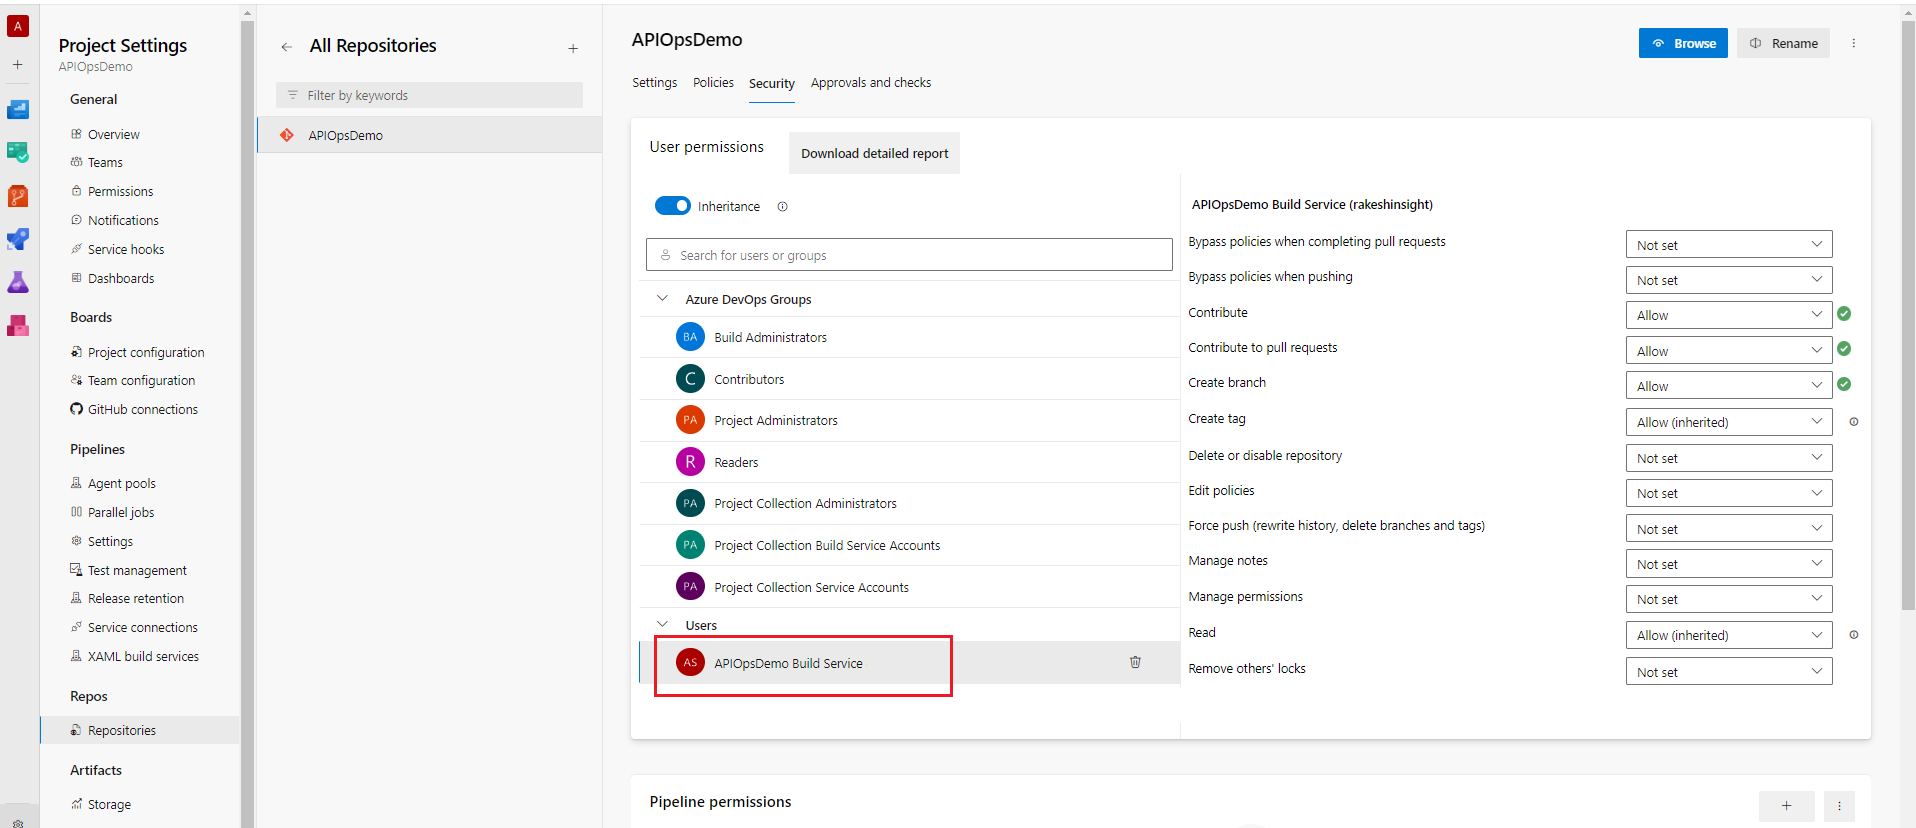
Before we run the
Extractorpipeline, we must grantContributorpermission to the Build Service account inApiOpsDemorepository. TheContributorpermission will be required for the pipeline to create a pull request. Navigate to Project Settings > Repositories. SelectApiOpsDemorepository and assign the permissions as shown in the below figure:
-
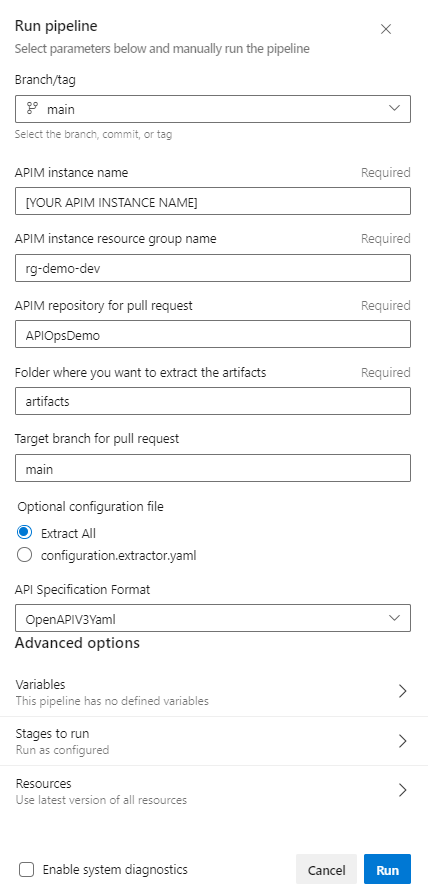
Navigate to the
Extractorpipeline and select Run Pipeline. Add the parameter values as shown in the below image and select Run:
-
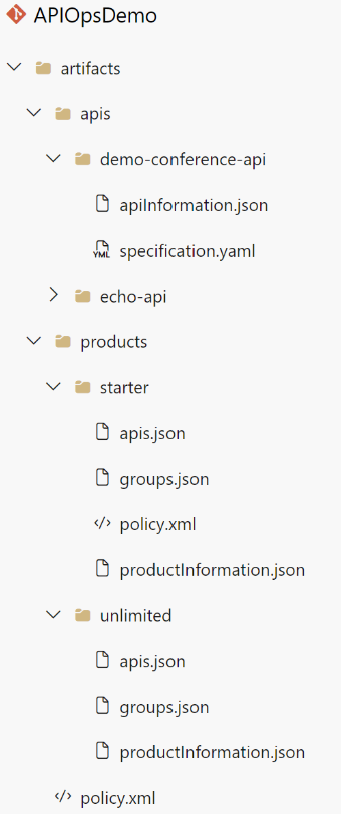
The pipeline scans the APIM instance and generates the API artifacts under the specified folder as shown in the below image. The pipeline also lints the code using Spectral API specification linter to ensure consistency throughout the codebase, and to also conform to API standards.
-
After generating the artifacts, the
Extractorpipeline creates a new branch and submits a pull request to themainbranch. Navigate to the pull request and merge the changes to themainbranch.
We now have Demo Conference API artifacts under version control. In the next section, we will be looking into how to deploy these artifacts to the APIM instance.
Publish API Artifacts from Pipeline
It is now time to test the deployment of Demo Conference API artifacts using Publisher pipeline. The Publisher pipeline is a multistage pipeline and divides the deployment process into two stages. The first stage deploys Demo Conference API to Dev environment. After successful deployment, the next stage executes to continue deploying to Prod environment. We will be introducing approval gates to control the deployment to Prod environment. In this tutorial, we are using only two environments. You can add additional environments by adding new stages to the pipeline.
-
Before running the deployment pipeline, we will first provision a new APIM instance for the
Prodenvironment.- Sign in to the Azure CLI by using the
az logincommand -
Create a resource group
rg-demo-prd$resourceGroupName='rg-demo-prd' az group create --name $resourceGroupName --location australiaeast -
Create the API Management service instance in the Developer tier. In the below snippet, I am using
apim-demo-prdas the name of the APIM. You should update the name to a unique value.$apimServiceName='[REPLACE-THIS]' $resourceGroupName='rg-demo-prd' az apim create --name $apimServiceName --resource-group $resourceGroupName \ --publisher-name Contoso --publisher-email admin@contoso.com \ --no-wait
- Sign in to the Azure CLI by using the
-
Create the
DevandProdenvironments inAPIOpsDemoproject:- In the Azure DevOps portal, select
APIOpsDemoproject. - Select Pipelines > Environments > Create environment.
- Enter
Devfor the environment name, and then select Create. - Repeat the step to create
Prodenvironment. While you are on thePrdenvironment page, select Approvals and checks and add one or more approvers.
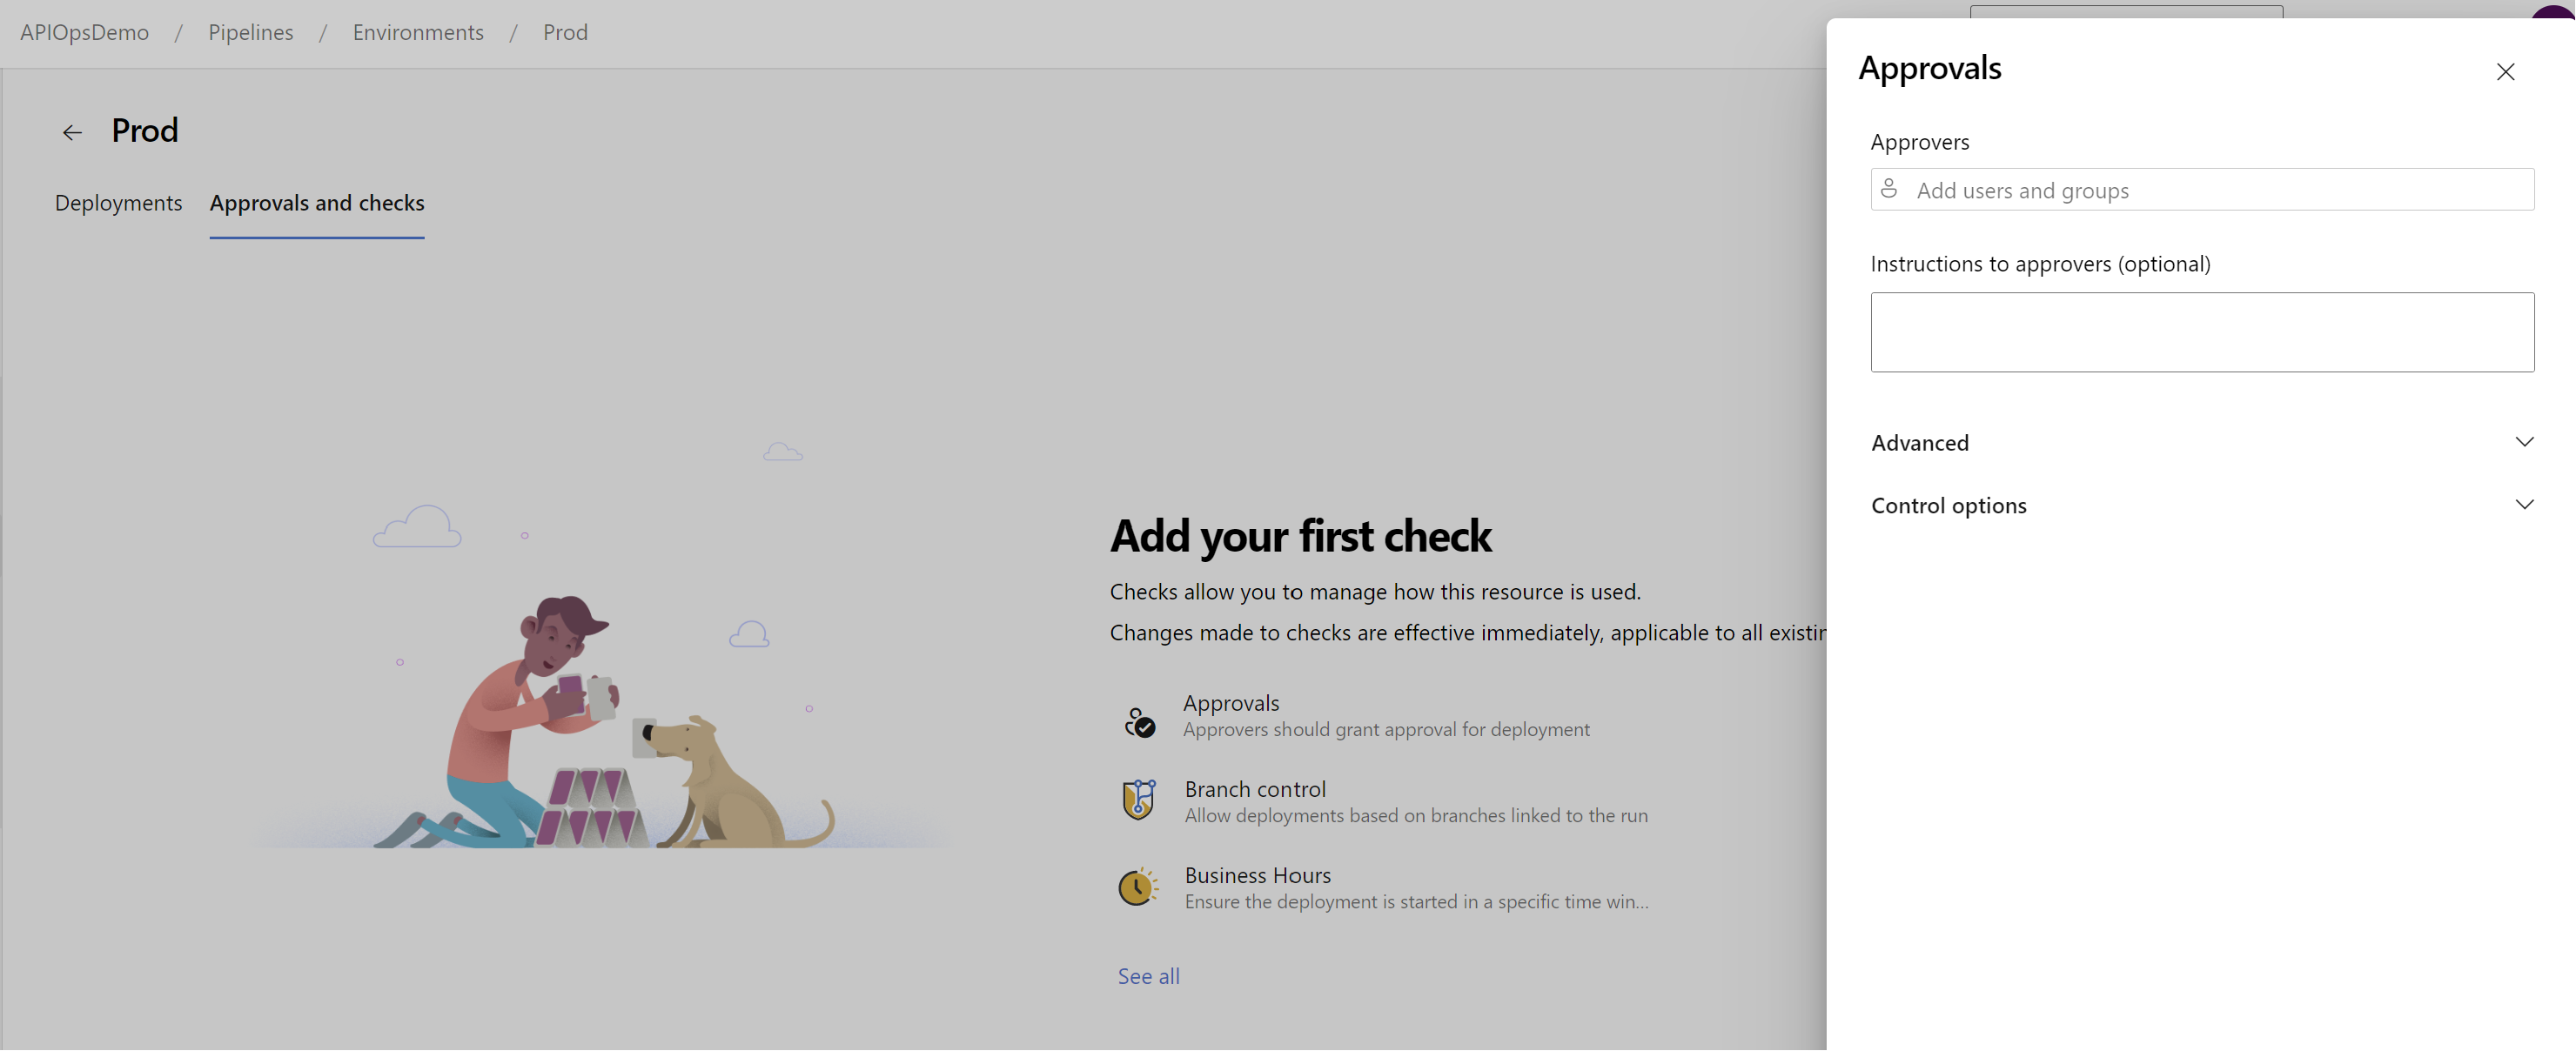
- In the Azure DevOps portal, select
-
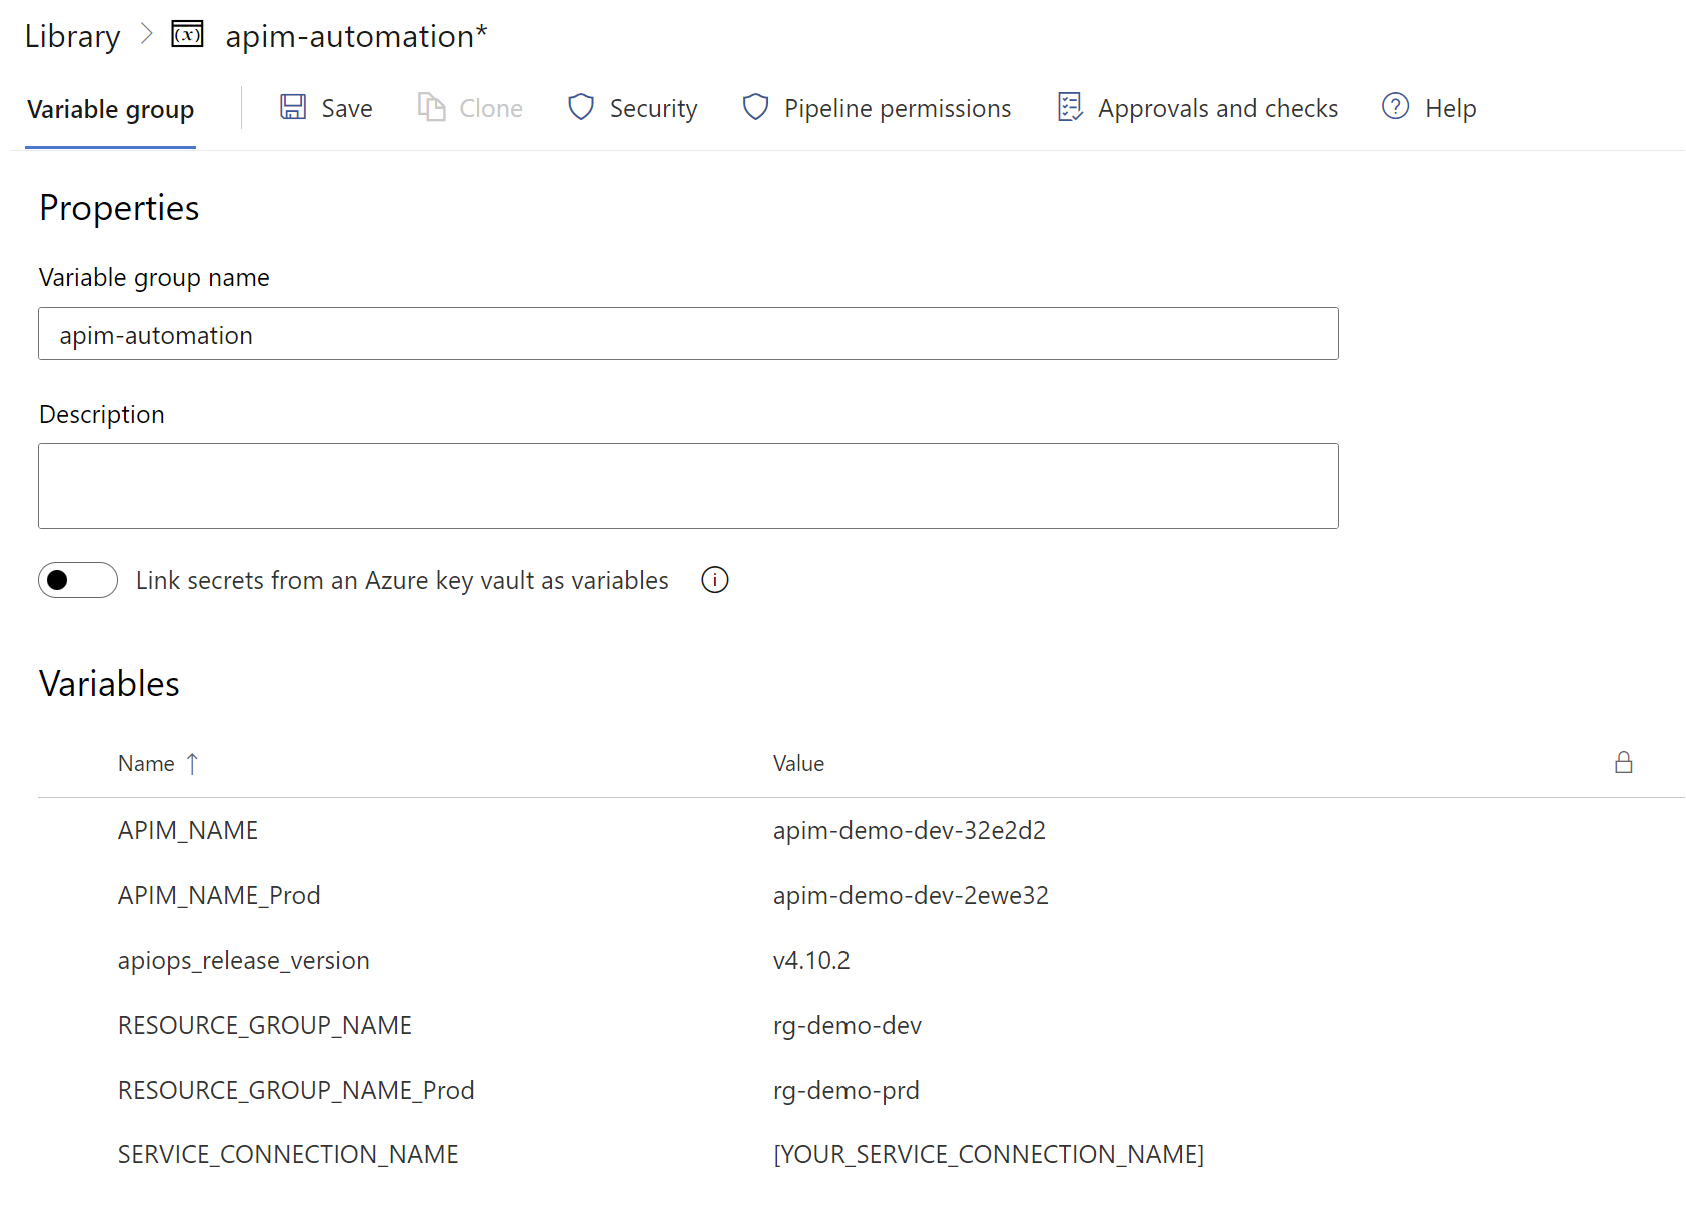
Now add the variables required for the pipeline:
- In the Azure DevOps portal, select
APIOpsDemoproject. - Select Pipelines > Library. Select the
apim-automationvariable group created earlier. - Enter the name and value for each of the following variables to include in the group.
Variable Name Description APIM_NAME Specify the name your APIM instance in Dev environment APIM_NAME_Prod Specify the name your APIM instance in Prod environment RESOURCE_GROUP_NAME The name of the resource groupfor Dev environment.
Specify the value asrg-demo-dev.RESOURCE_GROUP_NAME_Prod The name of the resource group for Prod environment.
Specify the value asrg-demo-prd.The variable group should now look as follows:
- In the Azure DevOps portal, select
-
Navigate to the
Publisherpipeline and select Run Pipeline. Add the parameter values as shown in the below image and select Run:
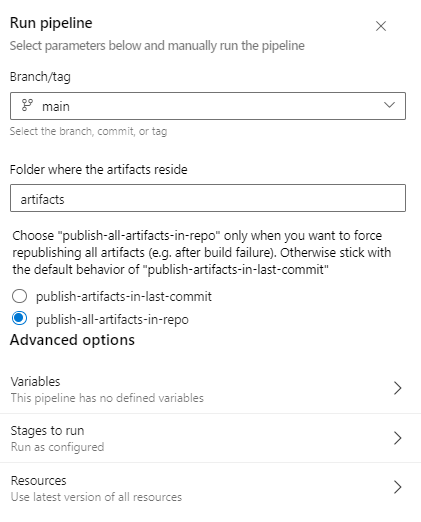
-
The API resources are now deployed to the APIM instance in the
Devenvironment. Navigate to the APIM instance in the Azure portal and verify the deployment. -
The pipeline waits for the approval before deploying to the
Prodenvironment. Go ahead and approve the deployment. You will now see that pipeline resumes and deploys the changes toProdenvironment. The API resources in theProdenvironment should now be in sync with theDevenvironment.
Conclusion
APIOps is a great solution for teams who build their APIs from the Azure portal and want to introduce DevOps practices. Some of the key benefits of using APIOps are as follows:
- Simplified deployment and configuration using out-of-the-box pipelines.
- Traceability and auditability of API changes by placing the API artifacts under version control.
- Improved productivity with code generation.
- Enforce API standards and best practices.
- Customizable pipelines to align with your project requirements.
While there is no industry standard for setting up the DevOps process for API Management, APIOps provides a great starting point. You can tailor the pipelines to align with your project requirements. For instance, you can customize the pipeline to add additional steps like linting, testing, etc. You can also modify the deployment process by adding additional environments, stages, control gates, etc.
In this post, we have demonstrated how to use APIOps toolkit to manage API lifecycle. We have also looked into how to setup the pipelines to deploy API resources to multiple environments. For a more indepth look into all the configuration options, refer to the APIOps documentation.